Collections
Integration
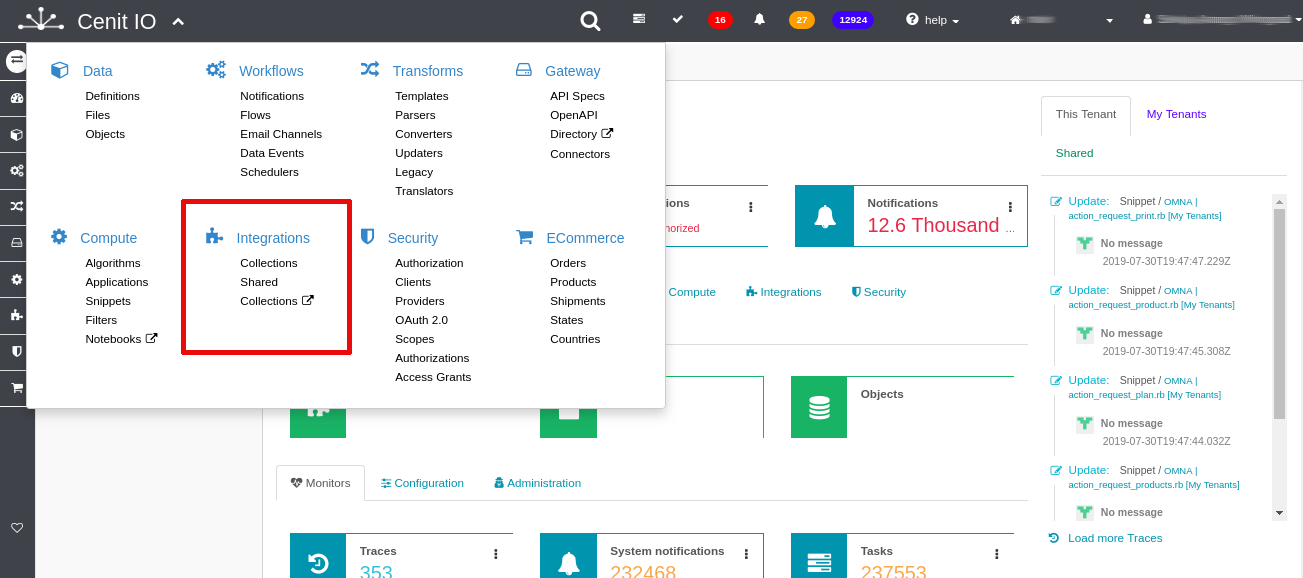
The integration menu is where you can define the collections and view the shared collection for your user or shared in Velosimo.
Collections
A collection is a way to organize a group of elements of an integration that you want save in your tenant, and later, export, import or share it to another account or tenant.
Also, is a way to group elements to share them in a same operation.
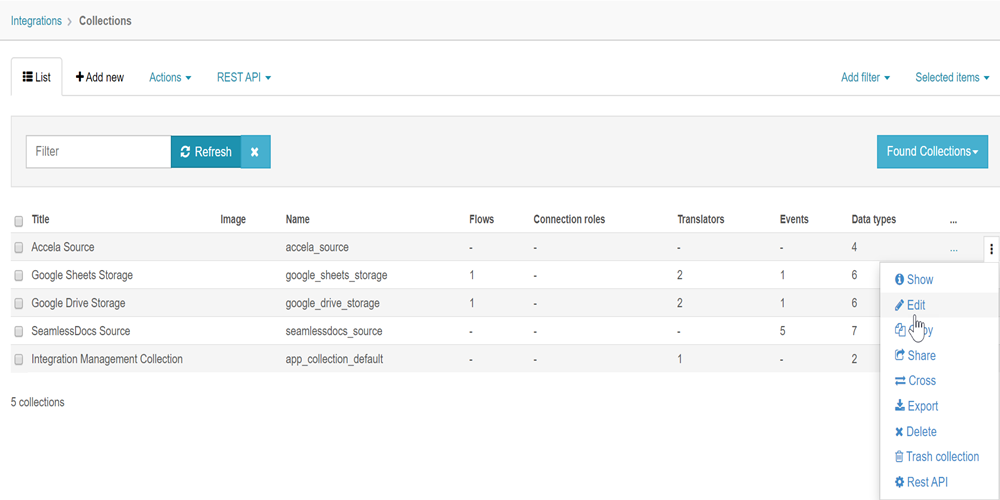
To go the Collection Section, go to Integration Menu/ Collections.
Add New
The collection name must start with a letter and not contain white spaces or any special characters.
In each section add the elements needed in your collection.
Create a Shared Collection
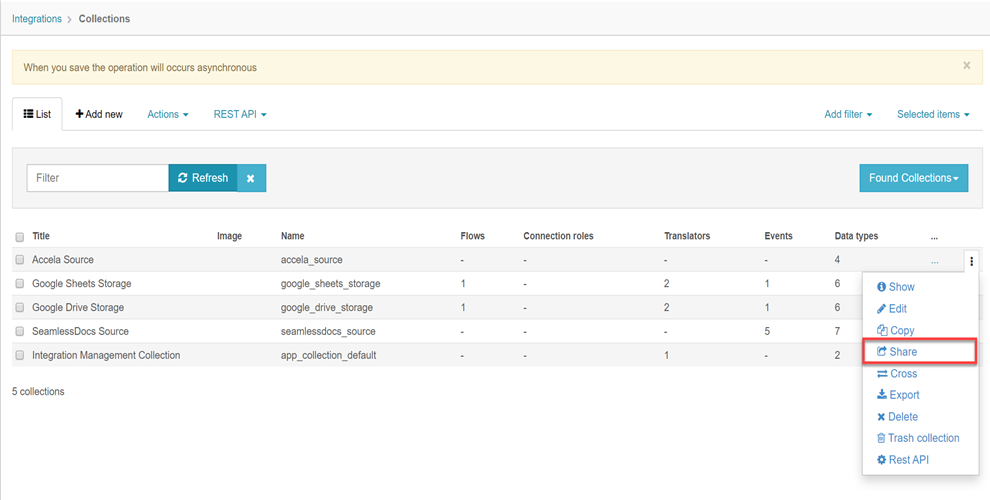
To share a collection go to, Actions Menu of the collection you want to share, and go to Share option.
-
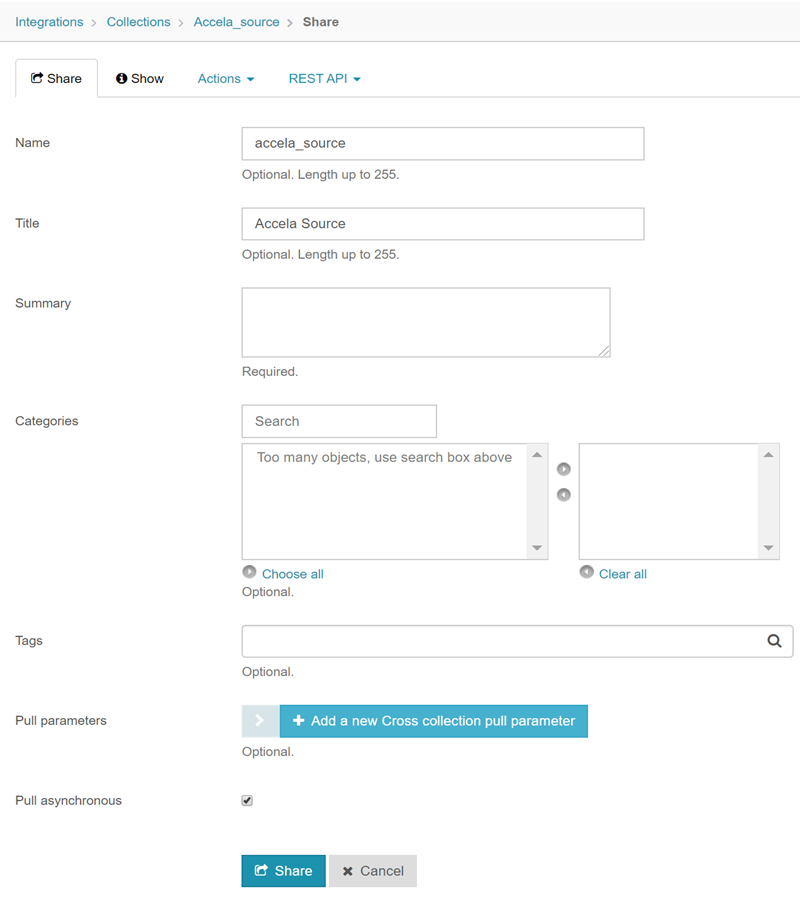
Name:
it must start with a letter and not contain white spaces or any special characters. Also, it only allows for minuscules.
-
Summary:
Collection description.
-
Categories:
This define the category where the collection will be as shared collection.
-
Pull Parameters:
These are defined as generic parameters necessary to establish in a collection when it will be incorporated into another tenant while Pull action. These parameters could be set into:
-
template_parameters of connections or webhooks into the collection.
-
any object reference of elements in a collection.
The pull parameters are optional, and its values aren't shared in a collection, so, when the user does pull to a collection, the pull parameters values will be requested.
-
-
Run asynchronous:
If it is enabled, means that the Pull action of the Shared collection will be done without asking you if the action could update or overwrite the possible existed elements into your tenant where you want to pull the collection.
Export a Collection
Sometimes you could have the needed to export your collection without shared to another account or tenant.
To do this, in Velosimo exists the "Export" action.
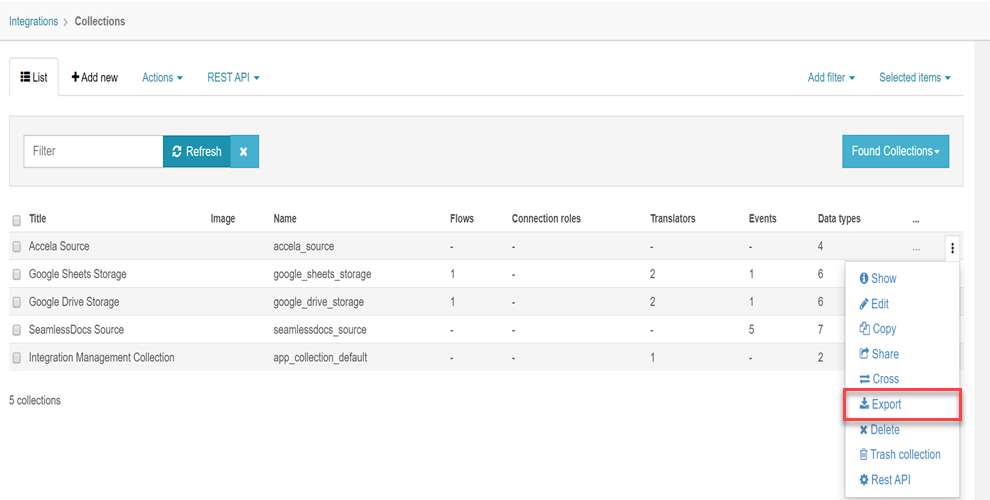
Export collection to JSON format
After select the Export option, select in the next form the translator: Basic | Share JSON [Shared]
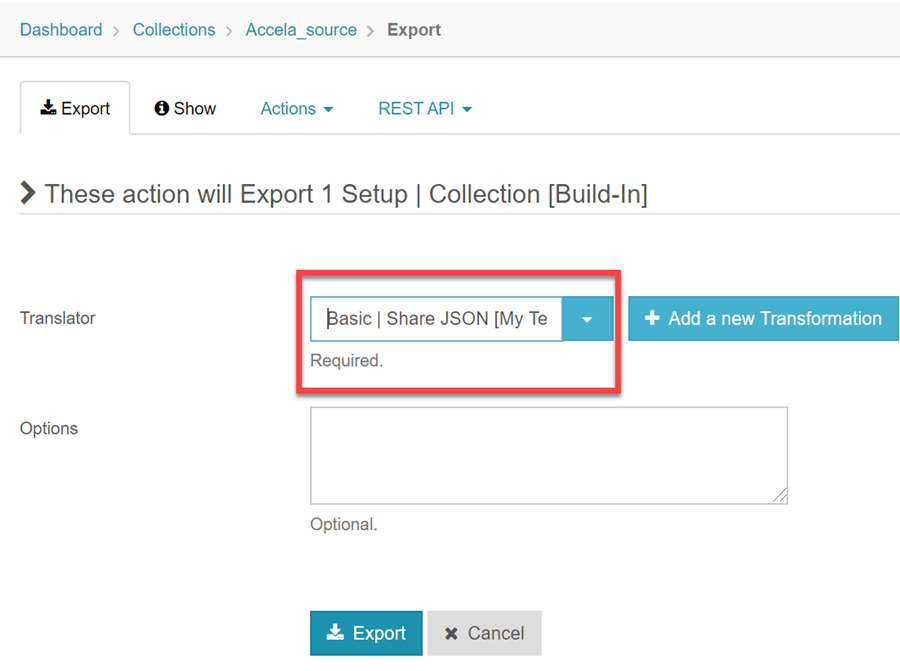
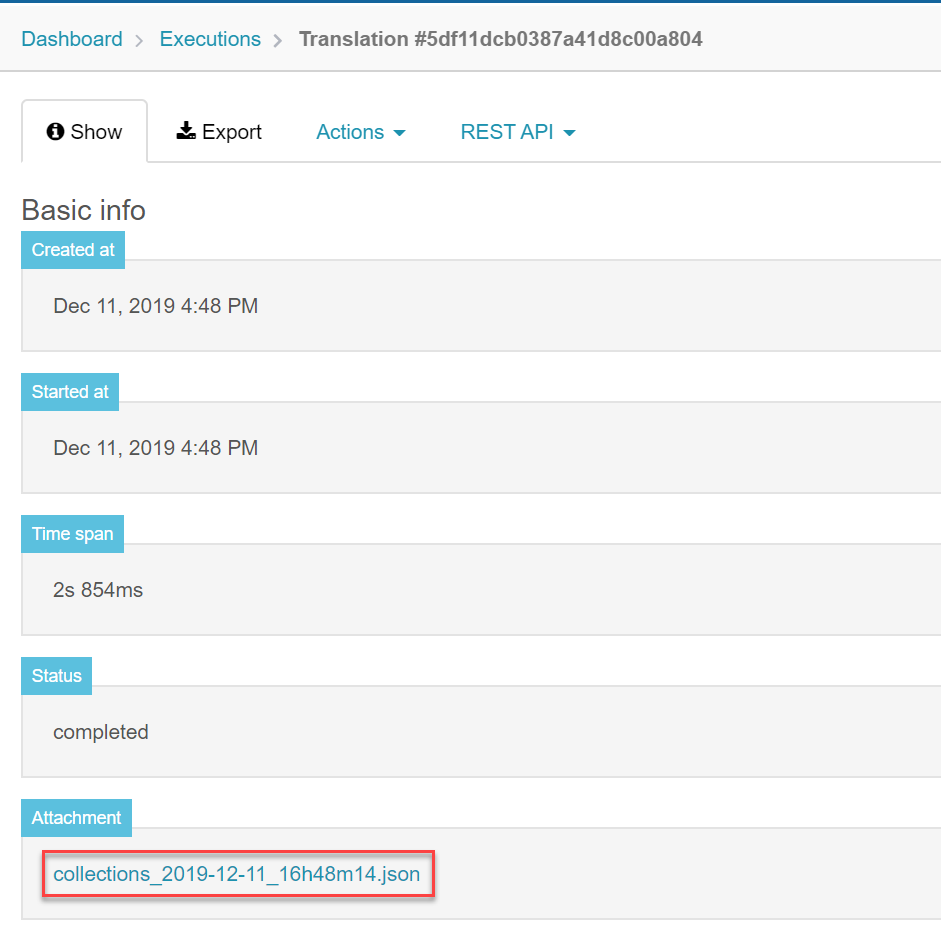
This action will generate a task that you need follow.

And there you will see the content of the collection in a .json file that you can save where you want, and later to import it where you need.
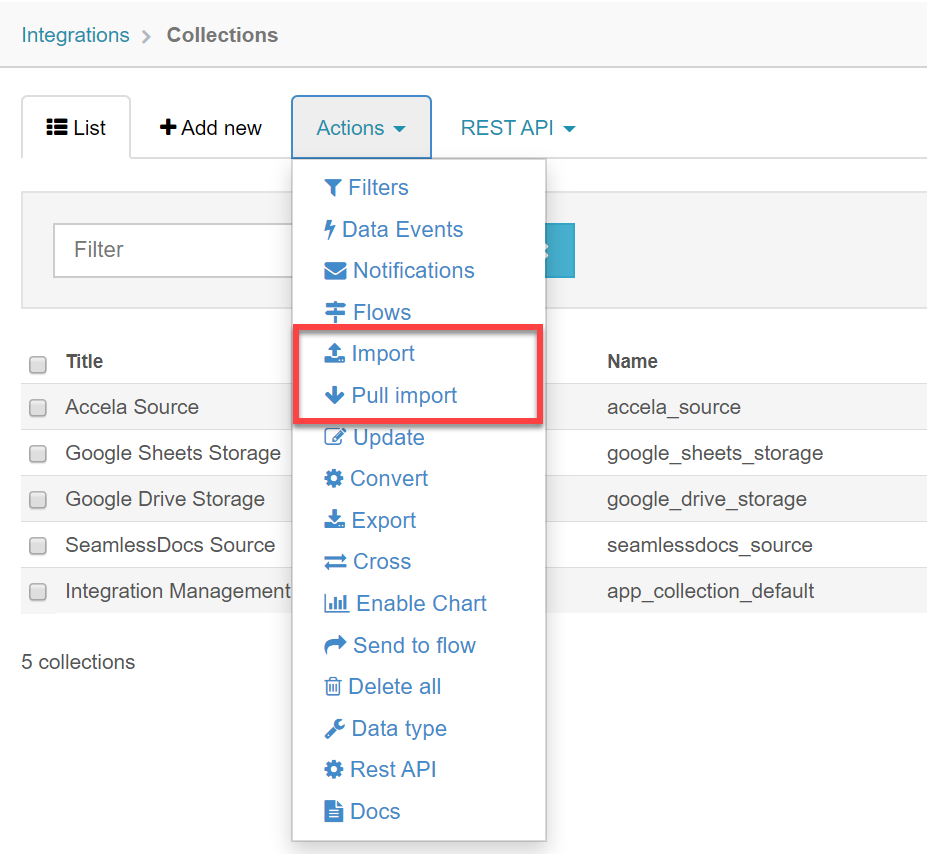
Import a Collection
After having a collection file exported, you will have the option to Import it. It could be the name of "Import" or "Pull Import" actions.
Import a .json collection file.
An Import action will import a new collection and the content of this into your tenant. If an element of the collection that you want to import already exists in the tenant, this action will overwrite it.
After clicked Import Action, you will see this form:

There you must select the translator: Basic | JSON Importer [Shared]
There are two options to import:
-
File: Select the .json file to import.
-
Data: Copy the json content in the Data box.
After choose one of two options, click "Import" button and the Import task will be executed. When the task finished, you will see the collection imported in your tenant.
Pull Import
A pull import action will import the content of the specified file, but it will have you the possibility to evaluate the changes that it would cause in your tenant. It means that the action will show you what elements will be created or updated in your tenant, and if you have in doubt about these actions, you can cancel the operation.
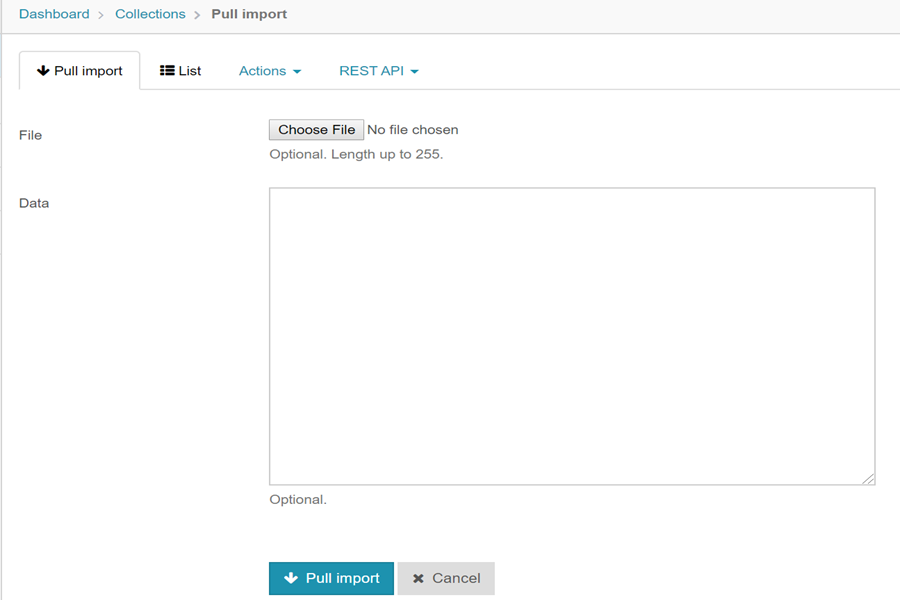
You can select a file or copy the data with the content you want import.
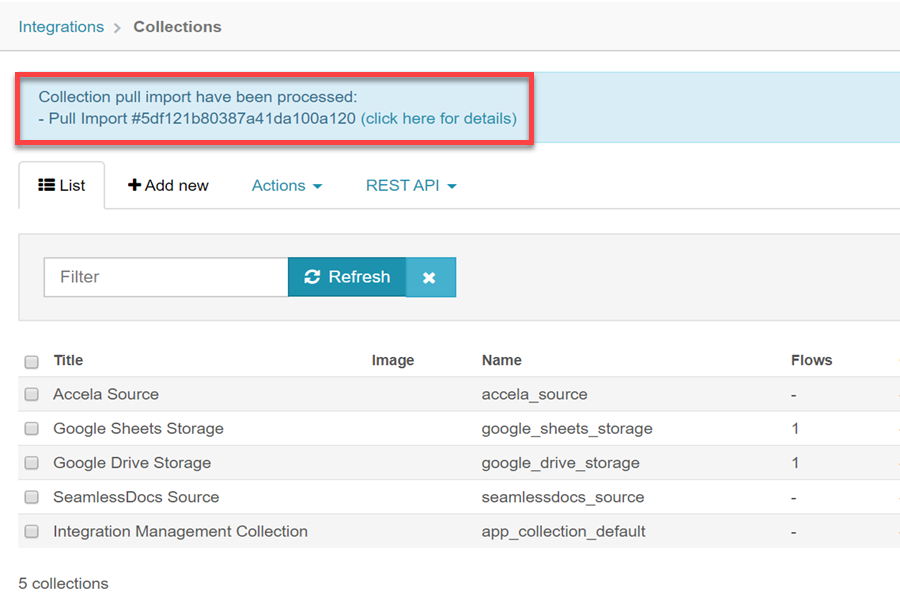
After clicking the Pull Import button, you can follow the task associated to it and check the status.
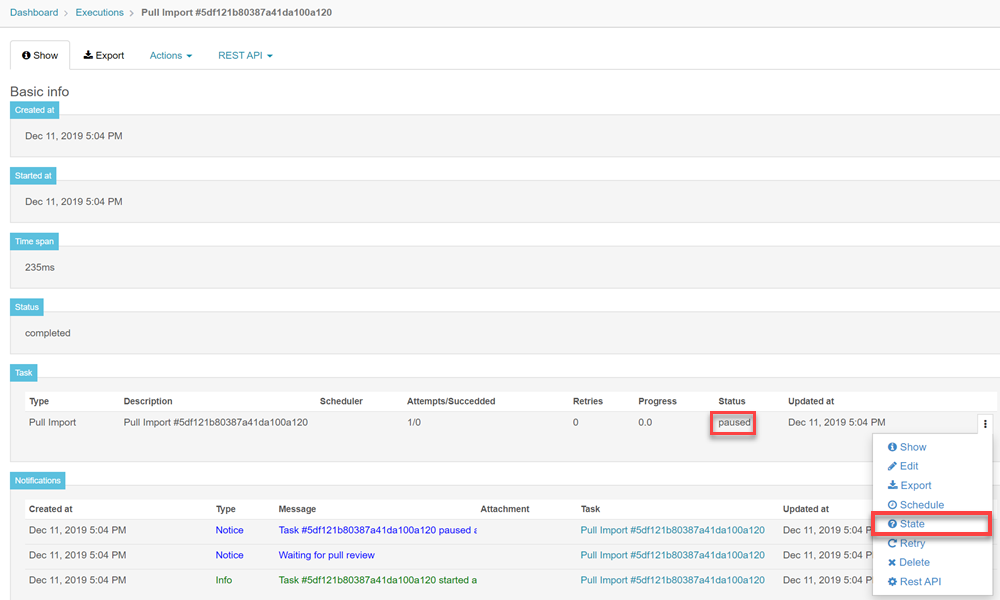
There you must view the task with status: Paused. It means you must accept if the changes will be applied. For do that, go to State option.
After that, you can confirm the operation and see the elements to create or update.
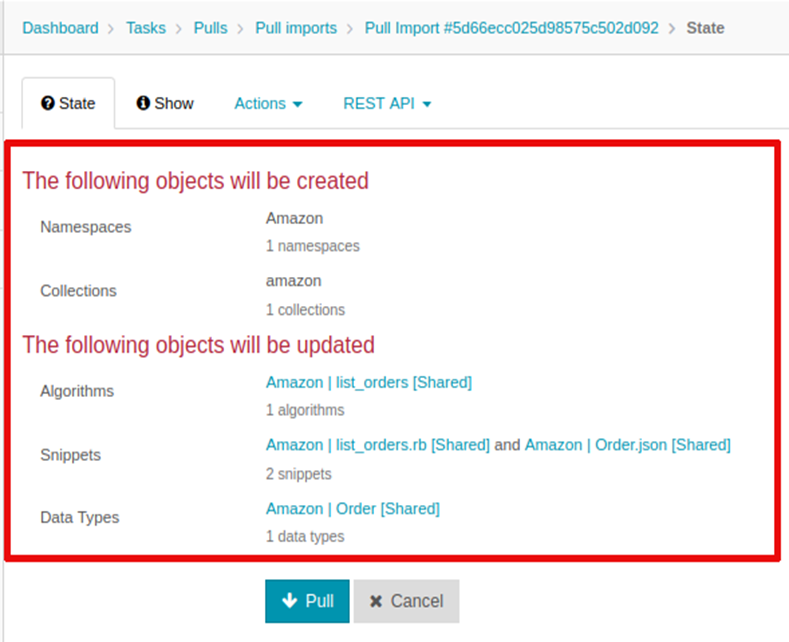
If you are agree click the Pull button. If not, cancel the task and the collection won't be pulled.